Wyeast 1056 - American Ale on the left for an IPA and Wyeast 3463 - Forbidden Fruit on the right for a Belgian Blonde.
Friday, July 15, 2011
Double brew-day Sunday = Double yeast-starter Friday
Posted by
Hogie
Labels:
All-grain,
Beer,
Homebrewing
Thursday, July 14, 2011
Monday, July 11, 2011
IPA II - Brewed with tips from a brewmaster
Posted by
Hogie
The first IPA was certainly satisfactory but wasn't exactly as envisioned. The final bitterness, aroma, body, head and alcohol content fell short of the pre-calculated values. It was still perfectly drinkable so I knew that I hadn't done anything "wrong" but there must have been something I could do "more right" during the next attempt.
As luck would have it, while attending the annual St. John's Beer Fest, I was introduced to the brewmaster at the Yellow Belly Brewery. We chatted briefly and he said that anytime I wanted to stop by and talk brewing, he would be more than happy to give me some tips, and... wait for it... free yeast!!
Now free (and fresh!) yeast might not sound like something most people would get excited about but I couldn't wait to schedule my next brew day and take him up on his offer. So I went down to see him one afternoon after work, with a bottle of my last IPA, the recipe sheet and a head full of questions.
The first thing we did was crack open the bottle I brought for him. It poured out with a decent head and a slightly darker colour than his Yellow Belly Pale Ale (one of the only hoppy beers served in Newfoundland). He took a few sips and commented "Good beer. I would drink that."... Not too bad, eh? I was pretty happy with that review anyway.
We spent the next hour discussing brewing (my process and his), and in the end I took away some tips that will stick with me for the rest of my brewing days. I won't go into any more detail than I have to, but a few things I learned are:
1. Boil everything it one pot - Having all the wort in one pot (as opposed to 3) leads to better hop utilization (ie: more bitterness), most consistent flavour and less liqud lost to boil-off.
2. Harden the water. The water in St. John's is quite soft (ie: low in calcium). A calcium deficiency can reduce the mash/boil efficiency, meaning less sugars and ultimately lower alcohol content.
3. Cool the wort faster. The faster you cool it down from boiling to room temp, the less hop aromas will escape and the less chance you have of a bacterial infection... I should say, the pot in the bathtub is only a slightly improved technique over leaving the pot in a snowbank for a couple hours. I hope to have a proper work chiller soon. Pending budgetary approval.
3. Get all the alpha acids oils out of the hops. He didn't advise me on this one, but rather that doing my normal slow wort straining using a sauce pan and strainer, I poured the cooled wort and hops through a straining bags and then squeezed every last ounce of hop oil into the beer.
4. Use healthy, viable yeast. It doesn't get much better than yeast fresh from a local microbrewery.
I also added some CaraPils malt to the recipe for better mouthfeel and foam stability.
Tasting/seeing the results, I am certainly very pleased and wouldn't change anything the next time I make it.
I left the brewmaster a bottle of it but unfortunately never got a chance to get his reviews before we moved back to PEI. I will look him up, the next time I'm over for a visit.
So farewell Newfoundland. The hoppiest beer ever served on the Rock (as far as I know) was a one-shot deal.
All the pics here.
As luck would have it, while attending the annual St. John's Beer Fest, I was introduced to the brewmaster at the Yellow Belly Brewery. We chatted briefly and he said that anytime I wanted to stop by and talk brewing, he would be more than happy to give me some tips, and... wait for it... free yeast!!
Now free (and fresh!) yeast might not sound like something most people would get excited about but I couldn't wait to schedule my next brew day and take him up on his offer. So I went down to see him one afternoon after work, with a bottle of my last IPA, the recipe sheet and a head full of questions.
The first thing we did was crack open the bottle I brought for him. It poured out with a decent head and a slightly darker colour than his Yellow Belly Pale Ale (one of the only hoppy beers served in Newfoundland). He took a few sips and commented "Good beer. I would drink that."... Not too bad, eh? I was pretty happy with that review anyway.
We spent the next hour discussing brewing (my process and his), and in the end I took away some tips that will stick with me for the rest of my brewing days. I won't go into any more detail than I have to, but a few things I learned are:
1. Boil everything it one pot - Having all the wort in one pot (as opposed to 3) leads to better hop utilization (ie: more bitterness), most consistent flavour and less liqud lost to boil-off.
| Now that's a big pot. |
2. Harden the water. The water in St. John's is quite soft (ie: low in calcium). A calcium deficiency can reduce the mash/boil efficiency, meaning less sugars and ultimately lower alcohol content.
![]() |
| Gypsum. Apparently the Sin Jawns wadda isn't 'ard enough. |
3. Cool the wort faster. The faster you cool it down from boiling to room temp, the less hop aromas will escape and the less chance you have of a bacterial infection... I should say, the pot in the bathtub is only a slightly improved technique over leaving the pot in a snowbank for a couple hours. I hope to have a proper work chiller soon. Pending budgetary approval.
| Improved cooling technique. |
3. Get all the alpha acids oils out of the hops. He didn't advise me on this one, but rather that doing my normal slow wort straining using a sauce pan and strainer, I poured the cooled wort and hops through a straining bags and then squeezed every last ounce of hop oil into the beer.
![]() |
| "Improved" straining technique. |
4. Use healthy, viable yeast. It doesn't get much better than yeast fresh from a local microbrewery.
![]() |
| Real brewery yeast. Fresh off the conical. |
![]() |
| Shaken and well poured. |
I also added some CaraPils malt to the recipe for better mouthfeel and foam stability.
Tasting/seeing the results, I am certainly very pleased and wouldn't change anything the next time I make it.
![]() | ||
| Nice active head. |
I left the brewmaster a bottle of it but unfortunately never got a chance to get his reviews before we moved back to PEI. I will look him up, the next time I'm over for a visit.
So farewell Newfoundland. The hoppiest beer ever served on the Rock (as far as I know) was a one-shot deal.
All the pics here.
Labels:
All-grain,
Beer,
Homebrewing
Saturday, April 9, 2011
Triple C IPA
Posted by
Hogie
Well due to several (positive!) events going on, I neglected the blog quite a bit in March... but that didn't keep me from brewing!!
Shortly after I went through my first all-grain brewing experience, I was eager to improve my technique and apply what I learned to another batch. A fellow Islander joined me for this brewing session and we split the costs and the bounty.
The choice of beer was easy. We wanted to brew a big IPA like the Garrison Brewery's Imperial IPA.
Now before I go too far, I just want to set the record straight and let you all know that our once-beloved Nova Scotia India Pale Ale is certainly not a IPA according to the Beer Style Guidelines. It is not even close to being bitter and hoppy enough...
In terms of recipe, we looked into a few IPA recipes from the Joy of Homebrewing and from other resources online. We were also reliant on the stock of the local homebrew store, which didn't happen to have the exact hops we were looking for originally. In any case, this was the final grain-bill:
We actually bought 15 lbs of the 2-row and then toasted 12 oz of it in the oven for 15mins @ 350F, stirring it around a bit after 10.
The mash was done in my converted Coleman cooler. We added hot water in a ratio of 1¼ quarts per pound to achieve a mash temperature of 155F (5.03 gallons @ 169F).
This was held for 60mins, after which the sweet liquor was drained out completely, yielding a volume of about 3.5 gallons. In order to account for evaporation during the boil, the final target volume was 7.5 gallons so we needed to rinse/drain the grain with 4 more gallons of water. This was split into two equal parts of near boiling water, which before draining was allowed to rest for 15mins each time.
This technique is called batch sparging and I found the process/result/stress-factor were much improved compared to the poor attempt we did at fly sparging the first go around with all-grain. Both sparging techniques are described more here.
Once the mash was done, we moved on to boiling the wort and added the following hops:
We also added 1 Tbsp of Irish Moss for the final 15 mins of the boil. This is supposed to attract solids and make your final product more clear. I think that it helped anyway.
The remaining 1oz each of Citra and Chinook were used to dry-hop the beer, after it had finished fermenting in the bucket and was transferred over to the carboy for conditioning.
The yeast we used was a classic American Ale yeast, Wyeast 1056. Their liquid yeast packs are only designed to inoculate five gallons of wort (up to 1.060 SG) and since our batch was around 6 gallons with an SG of ~1.070, we needed to grow more cells ahead of time.
I used this online calculator and since I wasn't sure how much I would be able to attend to it, I compared the results from Intermittent Shaking to Simple Starter and averaged them. Meaning a 1.5L starter would suffice. This was the recipe for the yeast starter:
Here's a link to the online recipe calculator I used which includes the calculated/estimated values for the final bitterness and alcohol percentage... a professional brewer estimated the actuals to be 6.5% and 45 IBUs. He said it was good enough for him to drink though!
It was fermenting in the bucket for 11 days, then dry-hopped in the carboy for 10, then bottled and allowed to carbonate for 9 more before we poured the first tasty glasses.
This beer was certainly delicious and between myself, SWMBO and a few other friends, we're almost out! Good thing I'm brewing more in the morning...
More pics here.
Shortly after I went through my first all-grain brewing experience, I was eager to improve my technique and apply what I learned to another batch. A fellow Islander joined me for this brewing session and we split the costs and the bounty.
The choice of beer was easy. We wanted to brew a big IPA like the Garrison Brewery's Imperial IPA.
Now before I go too far, I just want to set the record straight and let you all know that our once-beloved Nova Scotia India Pale Ale is certainly not a IPA according to the Beer Style Guidelines. It is not even close to being bitter and hoppy enough...
| The first 2 glasses of our IPA, served in ironic mugs. |
In terms of recipe, we looked into a few IPA recipes from the Joy of Homebrewing and from other resources online. We were also reliant on the stock of the local homebrew store, which didn't happen to have the exact hops we were looking for originally. In any case, this was the final grain-bill:
- 14lb 4oz Canadian 2-row Pale Malt
- 500g Crystal Malt - 40L
- 12oz Toasted Malt
We actually bought 15 lbs of the 2-row and then toasted 12 oz of it in the oven for 15mins @ 350F, stirring it around a bit after 10.
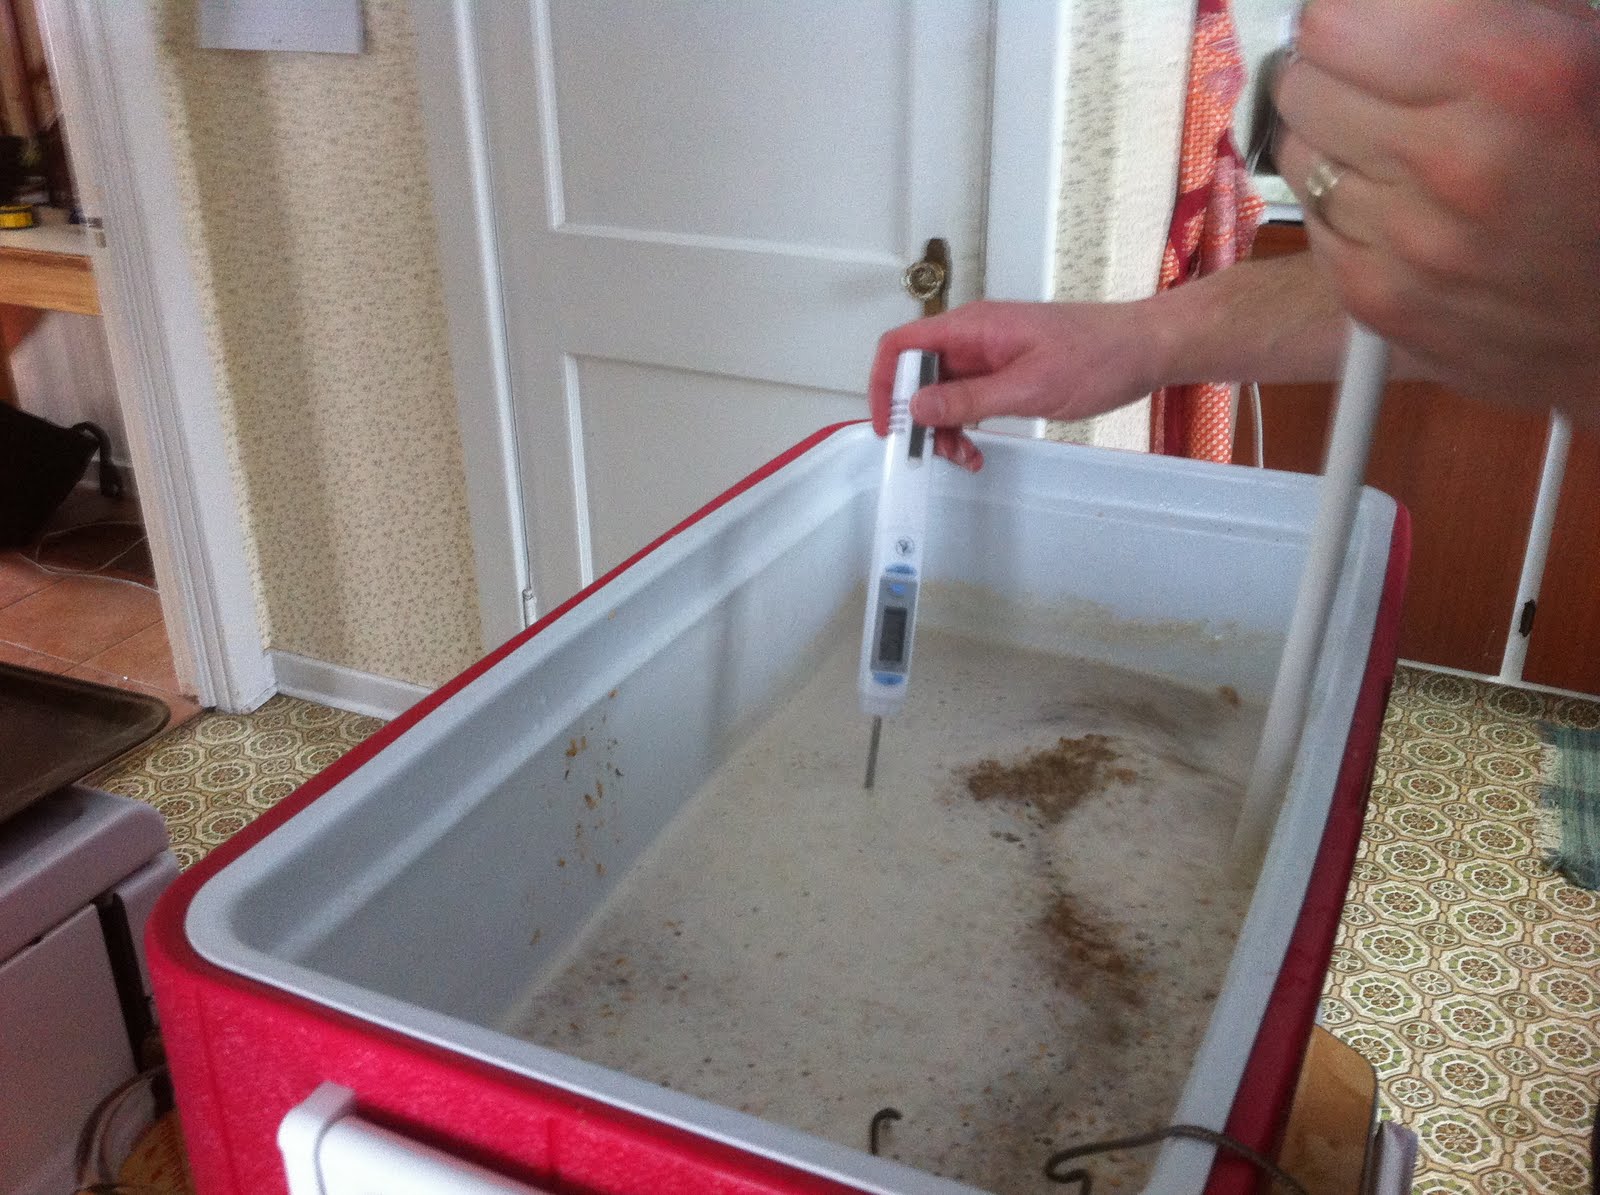
The mash was done in my converted Coleman cooler. We added hot water in a ratio of 1¼ quarts per pound to achieve a mash temperature of 155F (5.03 gallons @ 169F).
![]() |
| Mashing in the grain with the hot water. |
| Checking the mash temperature |
This was held for 60mins, after which the sweet liquor was drained out completely, yielding a volume of about 3.5 gallons. In order to account for evaporation during the boil, the final target volume was 7.5 gallons so we needed to rinse/drain the grain with 4 more gallons of water. This was split into two equal parts of near boiling water, which before draining was allowed to rest for 15mins each time.
| The drained grain. |
This technique is called batch sparging and I found the process/result/stress-factor were much improved compared to the poor attempt we did at fly sparging the first go around with all-grain. Both sparging techniques are described more here.
Once the mash was done, we moved on to boiling the wort and added the following hops:
- 2oz Chinook (full boil - 60mins)
- 1oz Citra (5mins remaining)
- 1oz Cascade (5mins remaining)
| Adding the boiling hops. |
We also added 1 Tbsp of Irish Moss for the final 15 mins of the boil. This is supposed to attract solids and make your final product more clear. I think that it helped anyway.
The remaining 1oz each of Citra and Chinook were used to dry-hop the beer, after it had finished fermenting in the bucket and was transferred over to the carboy for conditioning.
![]() |
| Dry-hopping with Citra and Cascade |
The yeast we used was a classic American Ale yeast, Wyeast 1056. Their liquid yeast packs are only designed to inoculate five gallons of wort (up to 1.060 SG) and since our batch was around 6 gallons with an SG of ~1.070, we needed to grow more cells ahead of time.
![]() |
| Growing the yeast starter. Picture taken before I found out the hard way the airlock was a bad idea. |
I used this online calculator and since I wasn't sure how much I would be able to attend to it, I compared the results from Intermittent Shaking to Simple Starter and averaged them. Meaning a 1.5L starter would suffice. This was the recipe for the yeast starter:
- Water - 1.5 L
- Dry Malt Extract (DME) - 1.5 cups
- Boil 10mins
- Add 3/4 tsp yeast nutrient
- Boil 10mins
- Cool to 20C in sink
- Pour into growler
- Shake to aerate
- Add yeast
Here's a link to the online recipe calculator I used which includes the calculated/estimated values for the final bitterness and alcohol percentage... a professional brewer estimated the actuals to be 6.5% and 45 IBUs. He said it was good enough for him to drink though!
It was fermenting in the bucket for 11 days, then dry-hopped in the carboy for 10, then bottled and allowed to carbonate for 9 more before we poured the first tasty glasses.
![]() |
| The state of fermentation after 4 days. |
This beer was certainly delicious and between myself, SWMBO and a few other friends, we're almost out! Good thing I'm brewing more in the morning...
More pics here.
Labels:
All-grain,
Beer,
Homebrewing
Friday, April 8, 2011
Friday, March 25, 2011
Snowcream with Dulce de Leche!
Posted by
Hogie
When life gives you lemons, make lemonade. And when life gives you snow... just shovel it and quit complaining!
But before that, make snowcream!
Anyway, I'm as sick of shoveling as the next guy, but here's a reason to look forward to the next snowfall and make the most of it.
To start, immerse a can of sweetened condensed milk in a pot of water. (Of course, if you don't have any on hand, you can skip down to the part where we make the ice cream.)
Boil for 3hrs. During which, it caramelizes and becomes dulce de leche!
It was in the midst of snowing, so we set a pot out on the step to collect what we could while we waited for the dulce de leche. Then when the time came, we scooped some more clean snow in to the pot. I was kind enough to let Laura go outside for the scooping.
Blend the snow with some milk, sugar and vanilla.
Here is the approximate recipe we used:
Hope you give it a shot next time it snows!
But before that, make snowcream!
| Even gremlins enjoy snowcream and dulce de leche. |
Anyway, I'm as sick of shoveling as the next guy, but here's a reason to look forward to the next snowfall and make the most of it.
To start, immerse a can of sweetened condensed milk in a pot of water. (Of course, if you don't have any on hand, you can skip down to the part where we make the ice cream.)
| Boiling a can of sweetened condensed milk for 3hrs |
Boil for 3hrs. During which, it caramelizes and becomes dulce de leche!
| The most amazing ice cream topping ever! |
It was in the midst of snowing, so we set a pot out on the step to collect what we could while we waited for the dulce de leche. Then when the time came, we scooped some more clean snow in to the pot. I was kind enough to let Laura go outside for the scooping.
![]() |
| Scoop faster! You're letting the heat out! |
Blend the snow with some milk, sugar and vanilla.
| Blending up the snowcream |
Here is the approximate recipe we used:
- 12 cups snow
- 1 cup milk
- 1 Tbsp vanilla
- 1 cup sugar
| Absolute heaven in a bowl |
Hope you give it a shot next time it snows!
Saturday, March 12, 2011
Subscribe to:
Posts (Atom)