Shortly after I went through my first all-grain brewing experience, I was eager to improve my technique and apply what I learned to another batch. A fellow Islander joined me for this brewing session and we split the costs and the bounty.
The choice of beer was easy. We wanted to brew a big IPA like the Garrison Brewery's Imperial IPA.
Now before I go too far, I just want to set the record straight and let you all know that our once-beloved Nova Scotia India Pale Ale is certainly not a IPA according to the Beer Style Guidelines. It is not even close to being bitter and hoppy enough...
 |
| The first 2 glasses of our IPA, served in ironic mugs. |
In terms of recipe, we looked into a few IPA recipes from the Joy of Homebrewing and from other resources online. We were also reliant on the stock of the local homebrew store, which didn't happen to have the exact hops we were looking for originally. In any case, this was the final grain-bill:
- 14lb 4oz Canadian 2-row Pale Malt
- 500g Crystal Malt - 40L
- 12oz Toasted Malt
We actually bought 15 lbs of the 2-row and then toasted 12 oz of it in the oven for 15mins @ 350F, stirring it around a bit after 10.
The mash was done in my converted Coleman cooler. We added hot water in a ratio of 1¼ quarts per pound to achieve a mash temperature of 155F (5.03 gallons @ 169F).
 |
| Mashing in the grain with the hot water. |
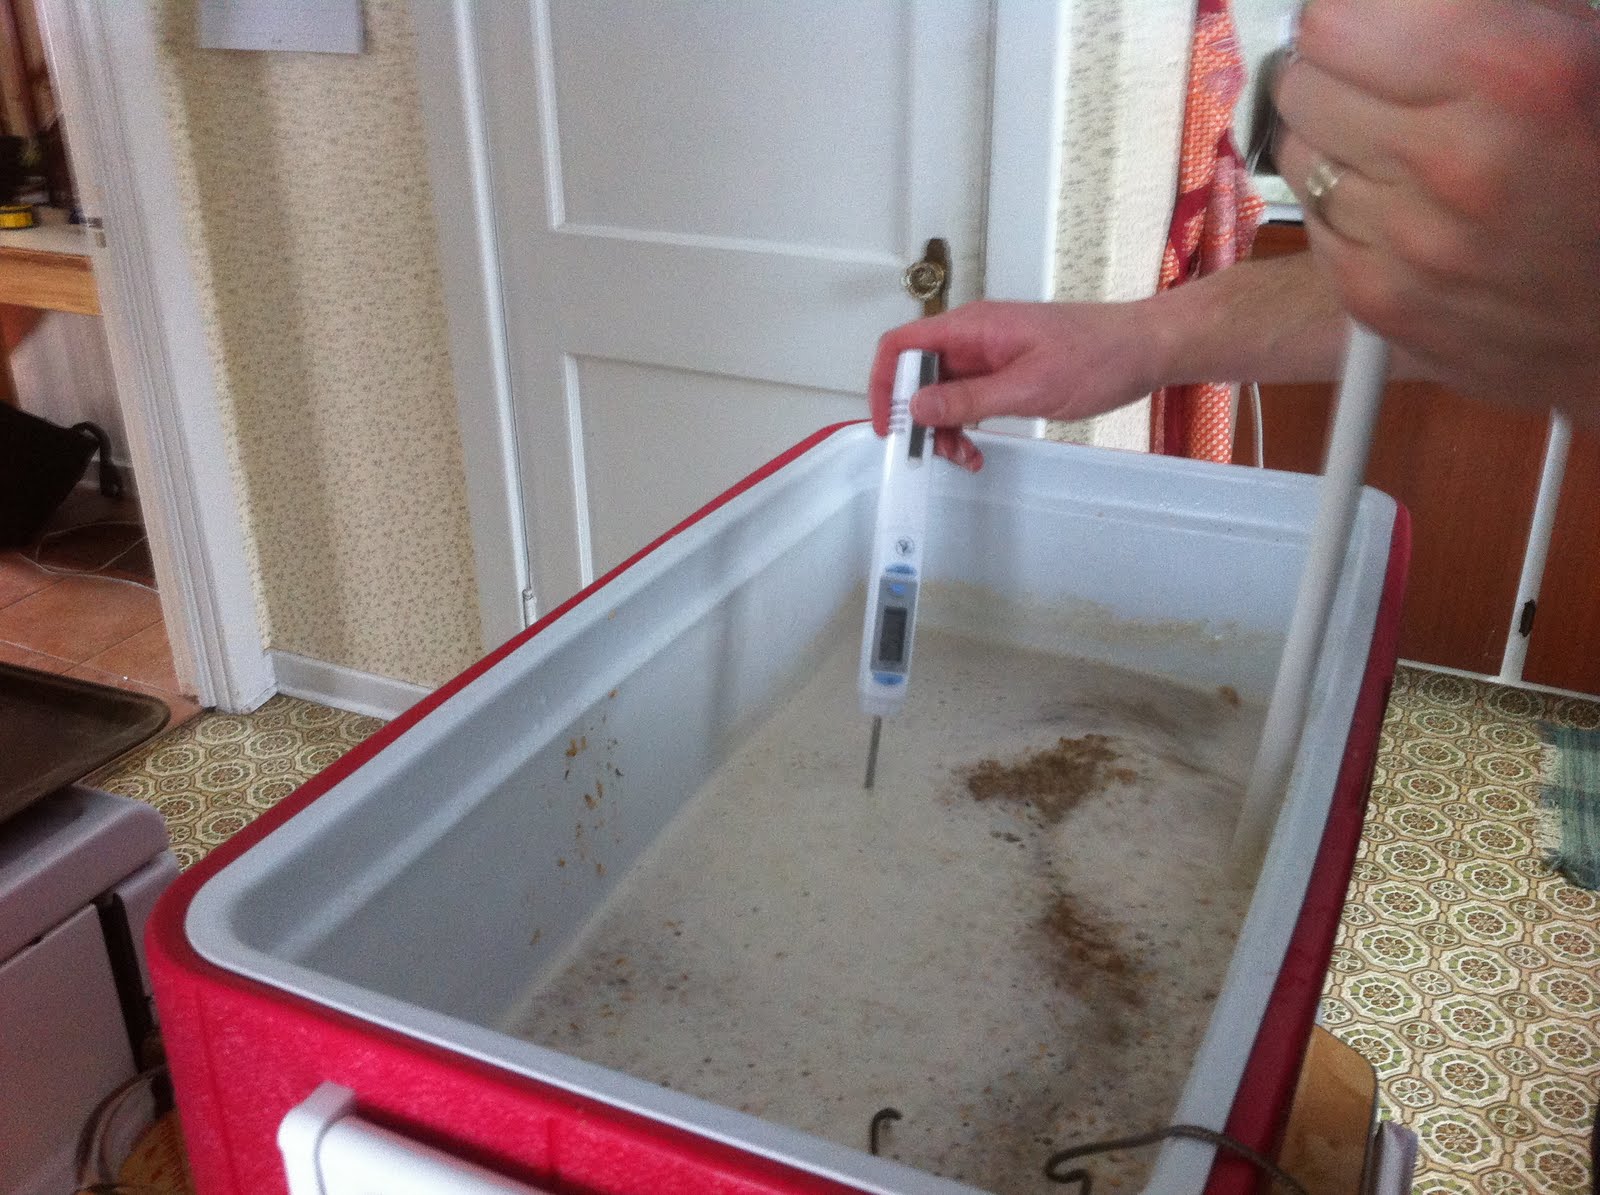 |
| Checking the mash temperature |
This was held for 60mins, after which the sweet liquor was drained out completely, yielding a volume of about 3.5 gallons. In order to account for evaporation during the boil, the final target volume was 7.5 gallons so we needed to rinse/drain the grain with 4 more gallons of water. This was split into two equal parts of near boiling water, which before draining was allowed to rest for 15mins each time.
 |
| The drained grain. |
This technique is called batch sparging and I found the process/result/stress-factor were much improved compared to the poor attempt we did at fly sparging the first go around with all-grain. Both sparging techniques are described more here.
Once the mash was done, we moved on to boiling the wort and added the following hops:
- 2oz Chinook (full boil - 60mins)
- 1oz Citra (5mins remaining)
- 1oz Cascade (5mins remaining)
 |
| Adding the boiling hops. |
We also added 1 Tbsp of Irish Moss for the final 15 mins of the boil. This is supposed to attract solids and make your final product more clear. I think that it helped anyway.
The remaining 1oz each of Citra and Chinook were used to dry-hop the beer, after it had finished fermenting in the bucket and was transferred over to the carboy for conditioning.
 |
| Dry-hopping with Citra and Cascade |
The yeast we used was a classic American Ale yeast, Wyeast 1056. Their liquid yeast packs are only designed to inoculate five gallons of wort (up to 1.060 SG) and since our batch was around 6 gallons with an SG of ~1.070, we needed to grow more cells ahead of time.
 |
| Growing the yeast starter. Picture taken before I found out the hard way the airlock was a bad idea. |
I used this online calculator and since I wasn't sure how much I would be able to attend to it, I compared the results from Intermittent Shaking to Simple Starter and averaged them. Meaning a 1.5L starter would suffice. This was the recipe for the yeast starter:
- Water - 1.5 L
- Dry Malt Extract (DME) - 1.5 cups
- Boil 10mins
- Add 3/4 tsp yeast nutrient
- Boil 10mins
- Cool to 20C in sink
- Pour into growler
- Shake to aerate
- Add yeast
Here's a link to the online recipe calculator I used which includes the calculated/estimated values for the final bitterness and alcohol percentage... a professional brewer estimated the actuals to be 6.5% and 45 IBUs. He said it was good enough for him to drink though!
It was fermenting in the bucket for 11 days, then dry-hopped in the carboy for 10, then bottled and allowed to carbonate for 9 more before we poured the first tasty glasses.
 |
| The state of fermentation after 4 days. |
This beer was certainly delicious and between myself, SWMBO and a few other friends, we're almost out! Good thing I'm brewing more in the morning...
More pics here.

0 comments:
Post a Comment